安装
下载rpm安装:1
2#rpm -ihv erlang-18.1-1.el6.x86_64.rpm
#rpm -ihv rabbitmq-server-3.5.6-1.noarch.rpm
默认配置启动:#systemctl start rabbitmq-server
如果超时,或无响应:
那么只需要修改一下hosts文件,增加你的主机名,注意,比如你的主机叫 demo.woplus,在hosts中配了 127.0.0.1 demo.woplus 也不行,你需要在hosts中再加一个 127.0.0.1 demo。
配置
第一件事要创建用户,因为缺省的guest/guest用户只能在本地登录,所以先用命令行创建一个admin/admin123,并让他成为管理员。1
2
3
4[root@master ~]# rabbitmqctl add_user admin admin123
Creating user "admin" ...
[root@master ~]# rabbitmqctl set_user_tags admin administrator
Setting tags for user "admin" to [administrator] ...
启动
启用WEB管理:1
2
3
4
5
6
7
8
9
10[root@master ~]# rabbitmq-plugins enable rabbitmq_management
The following plugins have been enabled:
mochiweb
webmachine
rabbitmq_web_dispatch
amqp_client
rabbitmq_management_agent
rabbitmq_management
Applying plugin configuration to rabbit@master... started 6 plugins.
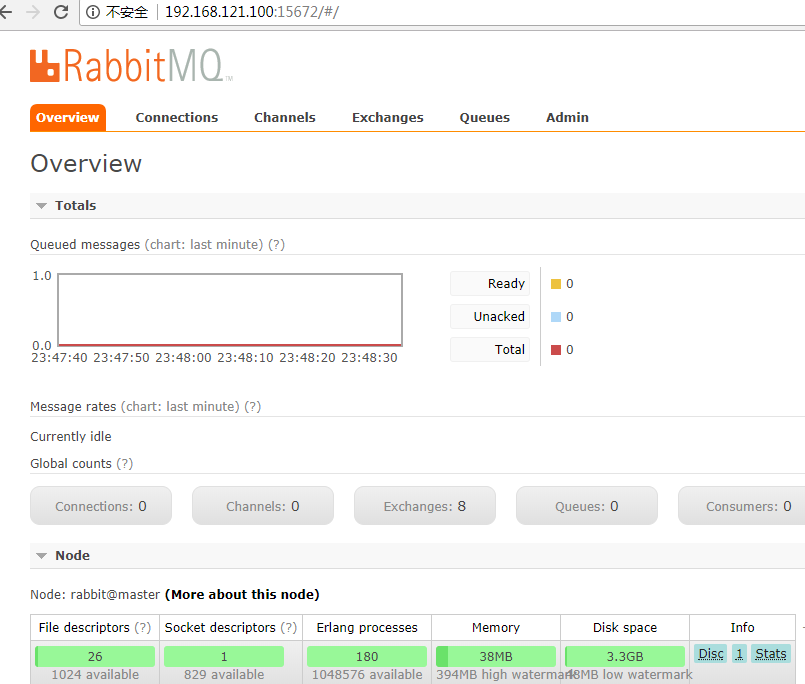
浏览器访问:
http://IP:15672/
如果不能访问,检查是否被代理了。一切正常登录后:

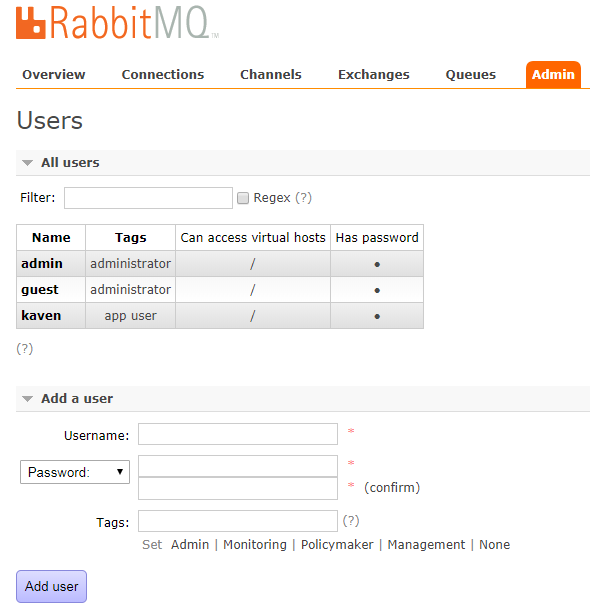
配置权限,添加用户kaven:

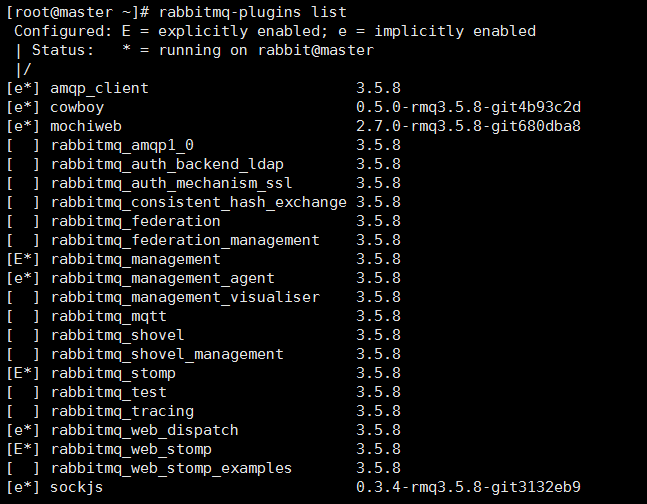
查看已启动的插件服务:
rabbitmq-plugins list
带*的表示正在运行,可以看到STOMP还没启动。
启动stomp:rabbitmq-plugins enable rabbitmq_web_stomp rabbitmq_stomp

查看端口启动情况:
1 | [root@master ~]# netstat -na |
我们可以在15670端口访问web-stomp-examples,其中RabbitMQ运行在15672端口,stomp服务运行在15674端口。
发送消息
JavaClient实现:
1 | package stomp; |
接收广播消息1
2
3
4
5
6
7
8
9
10
11
12
13
14
15
16
17
18
19
20
21
22
23
24
25
26
27
28
29
30
31
32
33
34
35
36
37
38
39
40
41
42
43
44
45
46
47
48package stomp;
import java.io.IOException;
import java.util.concurrent.TimeoutException;
import com.rabbitmq.client.Channel;
import com.rabbitmq.client.Connection;
import com.rabbitmq.client.ConnectionFactory;
import com.rabbitmq.client.ConsumerCancelledException;
import com.rabbitmq.client.QueueingConsumer;
import com.rabbitmq.client.ShutdownSignalException;
/**
*
* Customer.java
* 功能:广播消息以接收者
* @author ranying
* 2017年12月12日
*/
public class Customer {
private final static String EXCHANGE_NAME = "amq.fanout";
public static void main(String[] args) throws IOException, TimeoutException, ShutdownSignalException, ConsumerCancelledException, InterruptedException {
ConnectionFactory factory = new ConnectionFactory();
factory.setHost("master");
factory.setUsername("kaven");
factory.setPassword("kaven123");
Connection connection = factory.newConnection();
Channel channel = connection.createChannel();
//订阅一个广播
channel.exchangeDeclare(EXCHANGE_NAME, "fanout", true);
String routingKey = "rabbitmq_routingkey";
String queueName = channel.queueDeclare().getQueue();
channel.queueBind(queueName, EXCHANGE_NAME, routingKey);
QueueingConsumer consumer = new QueueingConsumer(channel);
channel.basicConsume(queueName, true, consumer);
System.out.println("Customer Waiting Received publish messages");
while (true) {
QueueingConsumer.Delivery delivery = consumer.nextDelivery();
String message = new String(delivery.getBody());
System.out.println(" [x] Received '" + message + "'");
}
}
}
接收队列消息1
2
3
4
5
6
7
8
9
10
11
12
13
14
15
16
17
18
19
20
21
22
23
24
25
26
27
28
29
30
31
32
33
34
35
36
37
38
39
40
41
42
43
44
45
46
47
48
49
50
51
52
53
54package stomp;
import java.io.IOException;
import java.util.concurrent.TimeoutException;
import com.rabbitmq.client.AMQP;
import com.rabbitmq.client.Channel;
import com.rabbitmq.client.Connection;
import com.rabbitmq.client.ConnectionFactory;
import com.rabbitmq.client.Consumer;
import com.rabbitmq.client.DefaultConsumer;
import com.rabbitmq.client.Envelope;
/**
* CustomerQueue.java
* 功能:队列消息接收者
*
* @author ranying 2017年12月12日
*/
public class CustomerQueue {
private final static String QUEUE_NAME = "rabbitmq_queue";
/**
* @param args
* @throws TimeoutException
* @throws IOException
*/
public static void main(String[] args) throws IOException, TimeoutException {
ConnectionFactory factory = new ConnectionFactory();
factory.setHost("master");
factory.setUsername("kaven");
factory.setPassword("kaven123");
Connection connection = factory.newConnection();
Channel channel = connection.createChannel();
//声明要关注的队列
channel.queueDeclare(QUEUE_NAME, true, false, false, null);
System.out.println("Customer Waiting Received queue messages");
//DefaultConsumer类实现了Consumer接口,通过传入一个频道,
// 告诉服务器我们需要那个频道的消息,如果频道中有消息,就会执行回调函数handleDelivery
Consumer consumer = new DefaultConsumer(channel) {
public void handleDelivery(String consumerTag, Envelope envelope, AMQP.BasicProperties properties,
byte[] body) throws IOException {
String message = new String(body, "UTF-8");
System.out.println("Customer Received '" + message + "'");
}
};
//自动回复队列应答 -- RabbitMQ中的消息确认机制
channel.basicConsume(QUEUE_NAME, true, consumer);
}
}


